
Quick Start Guide
- Once you have unpacked the printer and its accessories, connect the power cable to the power supply unit, then plug the power cable connector into the printer.
- Plug the power cable into a grounded power socket.
- The printer is powered on.
- The pushbutton lights up, indicating that the printer is operational.
- Take the Badgy CD-Rom and insert it in your computer.
- Caution: You must install the printer driver before you install the 'Badge Studio' software.
- Click '1. Install the driver' and select your installation language.
- Caution: At this stage, the printer must not be connected to the USB port.
- A program will guide you through the entire installation process for the driver.
- Wait until the printer driver has been installed before connecting the printer to the computer with the USB cable.
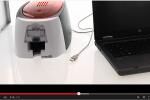
- Once the driver has been installed, connect the USB cable to the computer and the printer.
- In the CD-Rom menu, click '2. Install Evolis Badge Studio'
- A program will guide you through the entire installation process for the software.
- Once the installation process is complete, the software will be launched automatically.
- Open the printer cover and insert the ribbon.
- Close the cover and press until a click is heard.
- Open the card feeder, insert the cards (print side facing up), then close the feeder.
- In Badge Studio, open the menu 'File > Print Settings' select your Badgy printer and click 'OK'
- Print by clicking the button in the software interface.
- You can find your printed cards in the output hopper.
